

Engineering
Dec 12, 2023
Onboarding for your Clerk App in 3 Steps


Roy Anger
Leverage Clerk’s customizable session tokens, publicMetadata and Next’s Middleware to create a robust onboarding experience within a few lines of code.
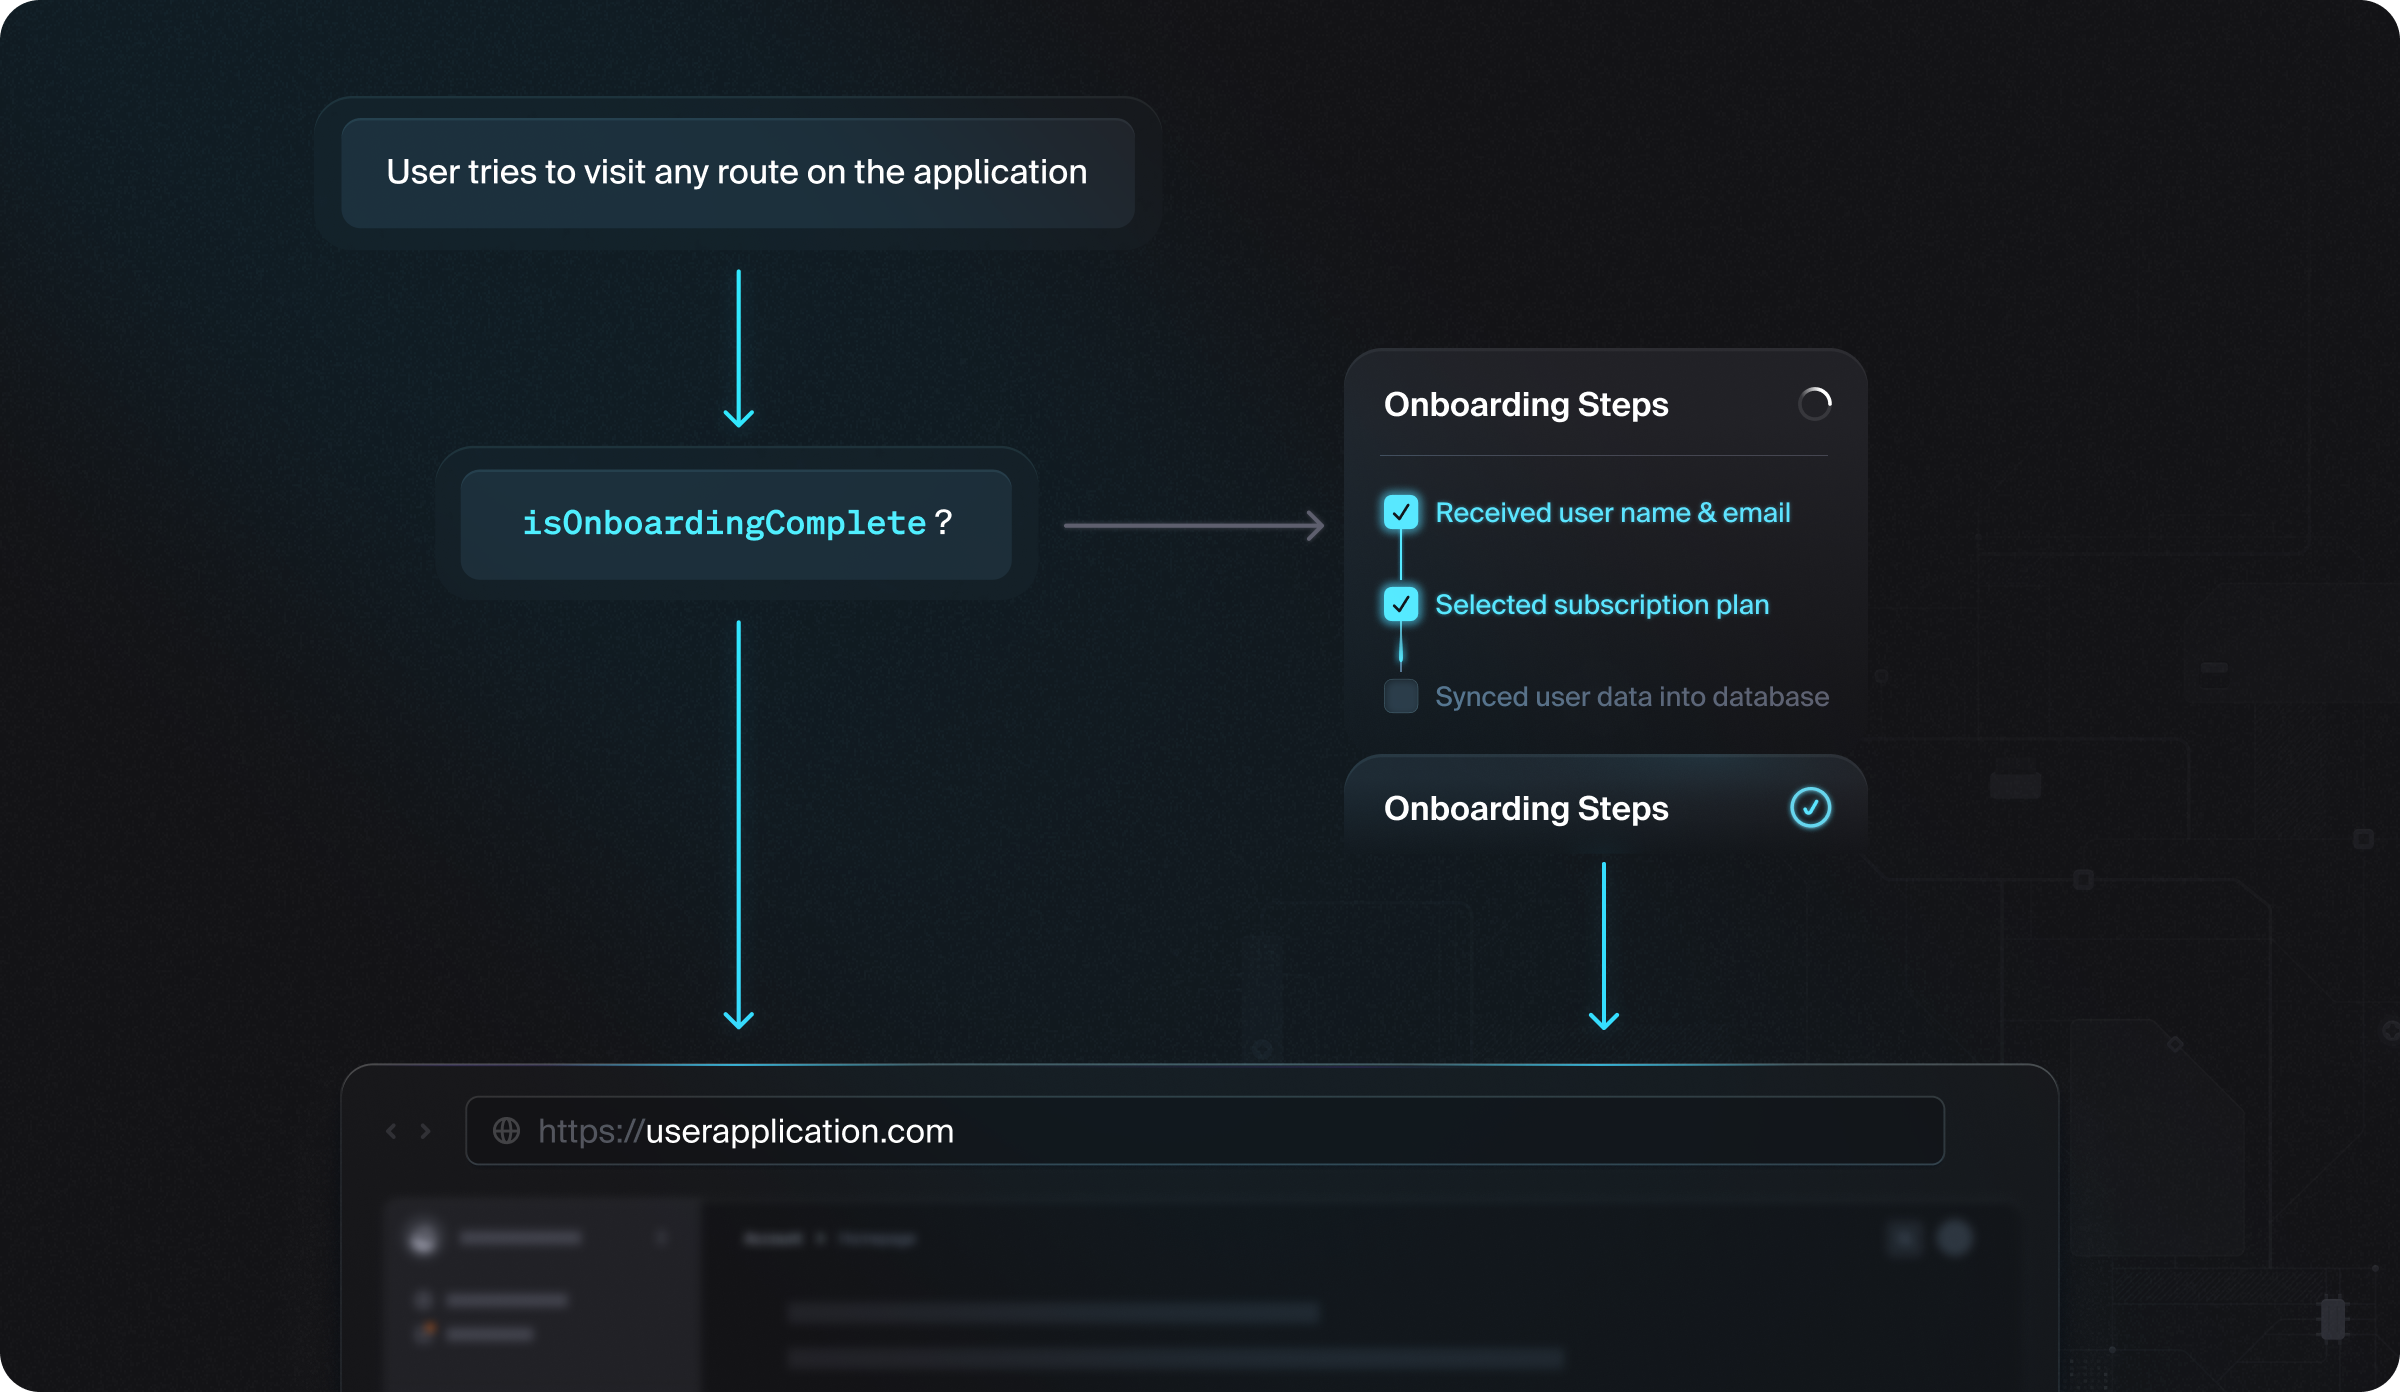
The user onboarding flow plays a crucial role in your application development journey, and Clerk simplifies this process for you. If you need to gather extra information and/or a user leaves mid-way before completing it, then you want to ensure that their progress is automatically saved and can be resumed from where they left off on their next sign-in.
In this guide, you will learn how to:
- Add custom claims to your session token
- Configure your middleware to read session data
- Update
publicMetadatabased on onboarding state
Let's get started!
Add custom claims to your session token
First, we're going to add publicMetadata right into the user's session so it's available without having to make a network call; then we'll use this to track the user's onboarding status and route them accordingly.
Session tokens are JWTs generated by Clerk on behalf of your instance, and convey an authenticated user session to your backend.
Head over to the Clerk Dashboard and navigate to the Sessions configuration page. On that page, scroll down to the "Customize session token" section and click the "Edit" button. In the open modal, there will be a window where you can augment your session token with custom claims.
Add the following claims and click save:
1{2"metadata": "{{user.public_metadata}}"3}
If you’re using TypeScript in your application, add the following to your types/globals.d.ts file.
1export { };23declare global {4interface CustomJwtSessionClaims {5metadata: {6onboardingComplete?: boolean;7};8}9}
Configure your Next.js middleware to read session data
Clerk's authMiddleware is the workhorse for this solution; it's responsible for seamlessly routing the user to exactly where they need to go based on their session details.
If the user does not have onboardingComplete: true, it will redirect the user to /onboarding, otherwise take them into your application.
In addition to this, it also handles three cases out of box:
- Allowing only authenticated users to visit a protected page
- Redirecting an unauthenticated user to sign in (or sign up)
- Allowing anyone to visit the public pages
Add the code sample below to your middleware.ts file
1import { authMiddleware } from "@clerk/nextjs";2import { redirectToSignIn } from "@clerk/nextjs/server";3import { NextRequest, NextResponse } from "next/server";45// This example protects all routes including api/trpc routes6// Please edit this to allow other routes to be public as needed.7// See https://clerk.com/docs/references/nextjs/auth-middleware for more information about configuring your Middleware8export default authMiddleware({9publicRoutes: ["/"],10afterAuth: async (auth, req: NextRequest, evt) => {11const { userId, sessionClaims } = auth;1213// For user visiting /onboarding, don't try and redirect14if (userId && req.nextUrl.pathname === "/onboarding") {15return NextResponse.next();16}1718// User isn't signed in and the route is private -- redirect to sign-in19if (!userId && !auth.isPublicRoute) return redirectToSignIn({ returnBackUrl: req.url });2021// Catch users who don't have `onboardingComplete: true` in PublicMetadata22// Redirect them to the /onboarding to complete onboarding23if (userId && !sessionClaims?.metadata?.onboardingComplete) {24const onboardingUrl = new URL("/onboarding", req.url);25return NextResponse.redirect(onboardingUrl);26}2728// User is logged in and the route is protected - let them view.29if (userId && !auth.isPublicRoute) return NextResponse.next();3031// If the route is public, anyone can view it.32if (auth.isPublicRoute) return NextResponse.next();33}34});3536export const config = {37matcher: ['/((?!.+\\.[\\w]+$|_next).*)', '/', '/(api|trpc)(.*)'],38};39
Update publicMetadata based on onboarding state
Now, the only thing left to do now is to make sure you update the user's publicMetadata as they complete their onboarding This requires three steps:
- Add a method to update the user’s
publicMetadatain the backend - Call this method on form submission
- Reload the user’s session for the change to take place
To update the publicMetadata, we can use a server action with a form on the page. Let’s start with a server action — we’ll add this in ../onboarding/_actions.ts.
The example below uses the clerkClient wrapper that Clerk provides to interact with the Backend API and update the user’s metadata.
1'use server'23import { auth, clerkClient } from "@clerk/nextjs/server"45export const completeOnboarding = async () => {6const { userId } = auth();78if (!userId) {9return { message: "No logged in user" };10}1112try {13await clerkClient.users.updateUser(userId, {14publicMetadata: { onboardingComplete: true }15});16return { message: 'User updated' };17} catch (e) {18console.log('error', e);19return { message: `Error updating user` };20}21}22
With that in place, we’ll add a basic page in ../onboarding/page.tsx and setup a form with just a submit button to complete onboarding. You will likely programmatically call this action once the user has completed their tasks, so this is just a very loose example.
In the handleSubmit() function, we first call the server action. Once that has finished, we will then reload the user to be sure the changes are reflected in the session and then redirect them to the /dashboard route.
1'use client'23import * as React from 'react'4import { useUser } from '@clerk/nextjs'5import { useRouter } from 'next/navigation'6import { completeOnboarding } from './_actions'789export default function Onboarding() {10const { user } = useUser()11const router = useRouter()1213const handleSubmit = async () => {14await completeOnboarding()15await user?.reload()16router.push("/dashboard")17}1819return (20<>21<form action={handleSubmit}>22<button type="submit">Complete</button>23</form>24</>25)26}
Wrap Up
Your onboarding flow is now complete! 🎉 New users who haven’t completed onboarding will now land on your /onboarding page. The floor is now open for you to build the onboarding flow you need, with the Clerk handling the rest for you.


Start now,
no strings attached
Start completely free for up to 10,000 monthly active users and up to 100 monthly active orgs. No credit card required.
Pricing built forbusinesses of all sizes.
Learn more about our transparent per-user costs to estimate how much your company could save by implementing Clerk.
Newsletter!
The latest news and updates from Clerk, sent to your inbox.